Sideview (Panel)#
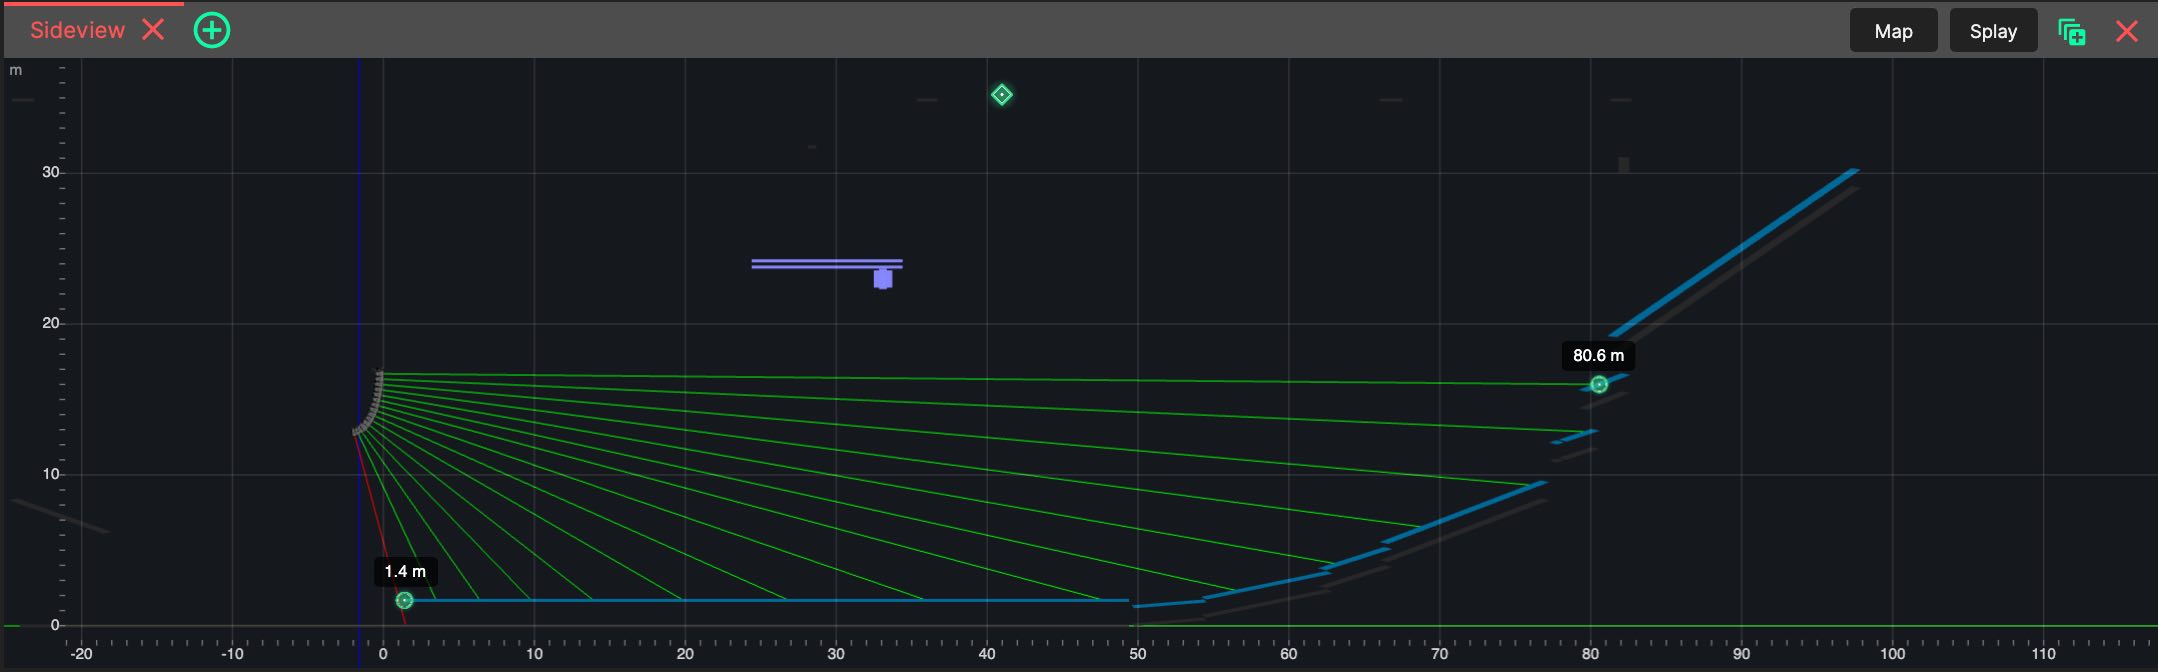
The Sideview is a vital tool for aiming a loudspeaker system and setting its splay angles, on a 2D cutview of the 3D View. It is the centrepiece of the 2D SOURCE tab, working hand-in-hand with the Frequency Response and SPL over Distance panels.
- Selecting an Array
Select the array from the Source Manager: click a row to select it, and click the same row again to cycle through its sub-sources (e.g. L then R of a stereo array). Alternatively, click the array in the 3D View - clicking it a second time deselects it. Clicking the empty area below the Source Manager list clears the selection. Horizontal subwoofer arrays are the exception, as they do not show a side view.
- Navigating
Drag empty space to pan, scroll to zoom toward the cursor, and double-click to re-fit the view. A ruler shows distances in your preferred unit.
- Aiming the Array with Throw Lines
Throw lines are drawn from the centre of each enclosure and can be dragged directly to aim the array:
Drag the top throw line to set the site angle, with a live degree readout.
Drag any lower throw line to choose from that element’s legal splay angles in a pop-up picker.
- Angle Locking
Click a throw line (or drag the lock boundary) to lock it and every line above it - locked lines turn yellow. Auto-Splay holds locked angles and re-splays the rest. Click the line again to unlock.
- Coverage Window
Drag the green start and end markers to set the audience window used by Auto-Splay, SPL over Distance and the Frequency Response Panel. Drag the diamond middle marker to slide the whole window without changing its width.
- Auto-Splay
Click the Splay button in the Sideview’s header to automatically splay the array to cover the coverage window. Auto-Splay requires a selected line-source array with more than one box, and a coverage window defined with the green markers - a warning message explains what is missing otherwise. While it runs, an ‘Auto-Splay in Progress’ dialog shows its progress; SPL rendering is paused for speed and restored afterwards. Locked elements keep their current splay angles. If the site angle is locked, it is kept and used as the far limit of the coverage. The resulting splay angles and site angle are written into the SVA Controller’s hang design table, where they remain manually editable.
- Vertical SPL Map
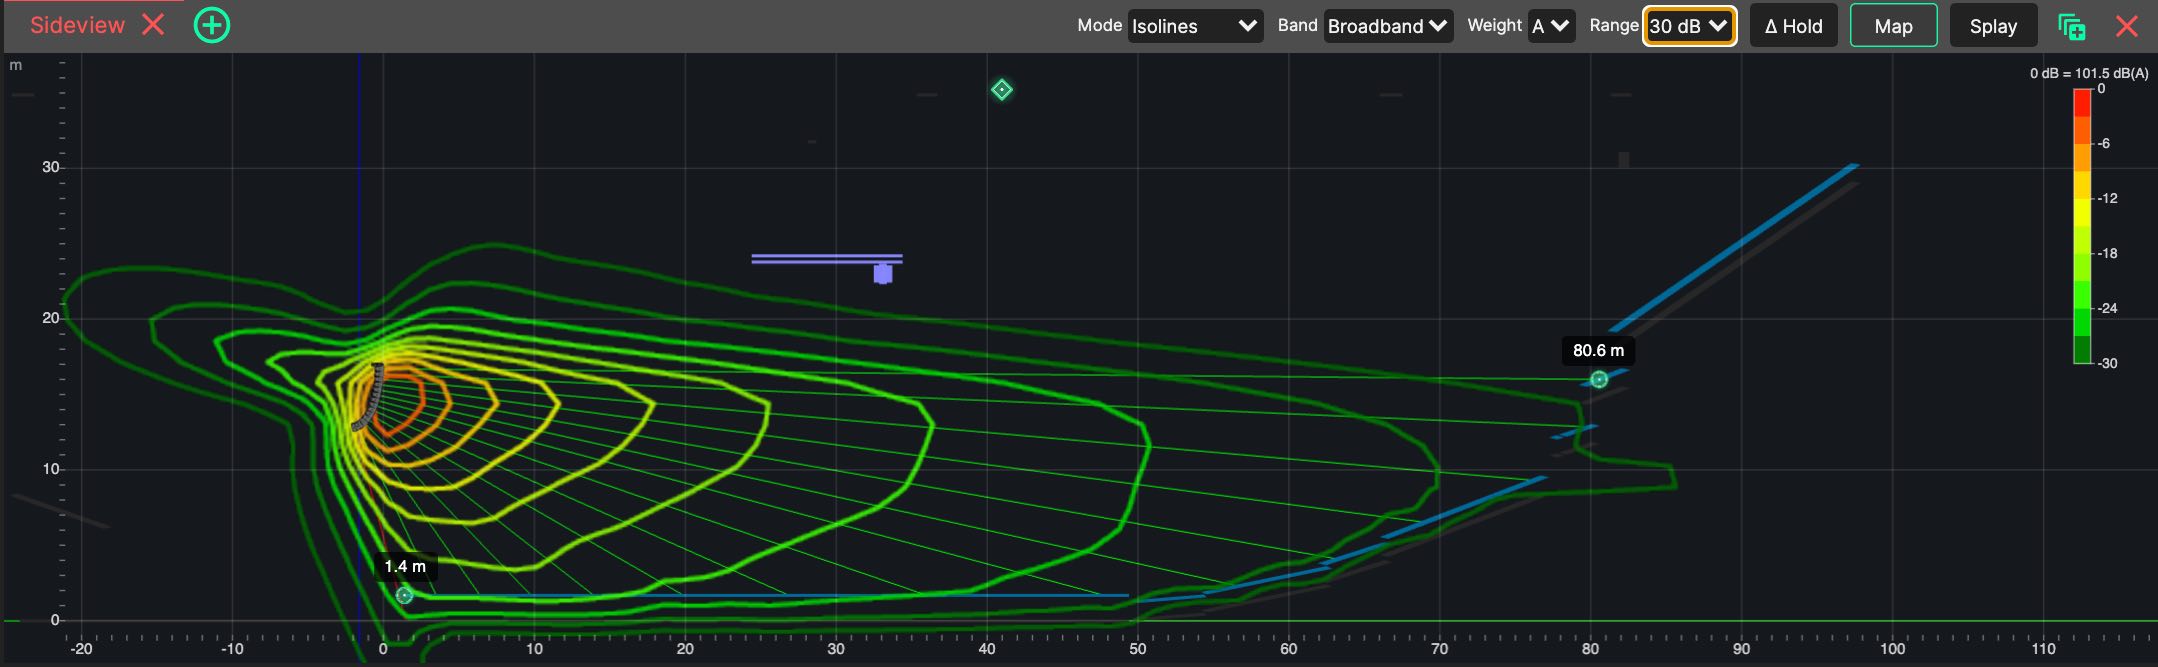
The Sideview can map the SPL of the selected array across its vertical plane - from the array down to and beyond the audience - so the vertical coverage can be judged at a glance while aiming and splaying. Click Map in the Sideview’s header to switch it on. It is off by default, and nothing is calculated while it is off.
While the map is on, these controls appear in the header:
Mode - Isolines (the default) draws contour lines; Heatmap fills the plane with a continuous colour gradient; Attenuation fills it with discrete 3 dB bands. Heatmap and Attenuation use the colour map chosen in the SPL Rendering Settings.
Band, Freq and Weight - the band category, the band within it and the weighting, as in the 3D View. Defaults are Broadband, A-weighted. Freq is hidden for Broadband. A slider beside Freq sweeps through the frequencies of the category, updating the map live.
Range - the dynamic range shown, from 12 to 48 dB (24 dB by default).
Δ Hold - see below.
The map is relative: 0 dB is the loudest point from the near edge of the audience onwards, so hot spots right in front of the array don’t set the scale. A legend in the top-right corner shows the colour scale from 0 dB down to the chosen range, and the absolute level that 0 dB stands for. Hover over the map to read the relative and absolute level at the cursor.
The map covers the visible part of the Sideview: zoom in for more detail. Changing the mode, band, frequency, weighting or range does not require a new calculation.
- Δ Hold - Comparing Before and After
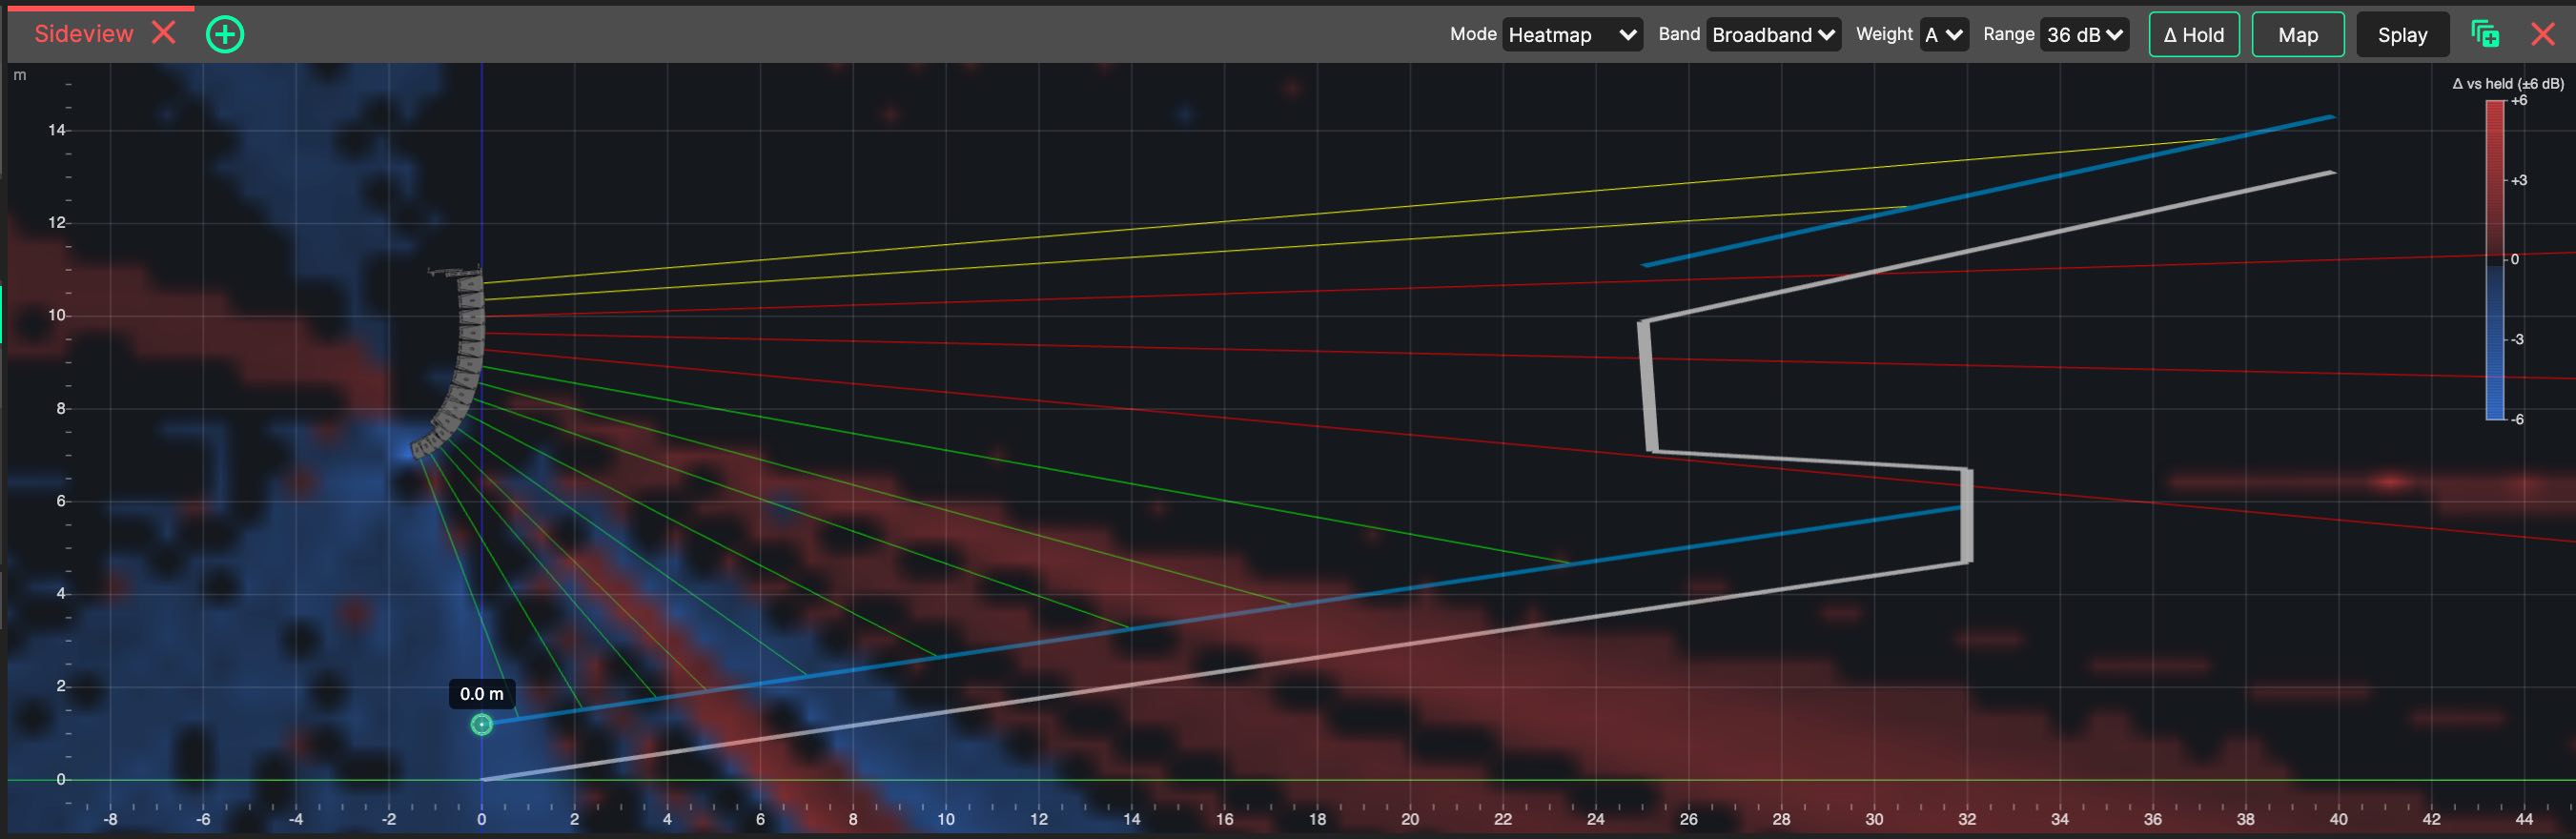
Click Δ Hold to freeze the current map as a reference. From then on, the map shows the difference between the current coverage and the held one: red where it is now louder, blue where it is now quieter (the colour is fully saturated at ±6 dB), and clear where nothing has changed. The legend and the hover readout switch to the difference as well.
For example: hold the map, change a splay angle or click Splay, and see exactly where the coverage gained or lost level. The map is paused while Auto-Splay runs and comes back afterwards, with the hold still in place. Click Δ Hold again to release the reference. Changing the band or weighting, or selecting another array, also releases it.
The colour indicator in the Sideview’s header corresponds to the colour of the outline around the selected source in the 3D view. Only one Sideview can be open per tab - it always follows the current selection.
As with all Panels, the Sideview Panel can be resized and moved using Panel Drag & Drop, and ‘popped out’ into an additional System Optimiser window. The location of this Panel will be saved as part of the current tab.