Maximum SPL / Headroom (Panel)
The Maximum SPL / Headroom panel is a new addition to System Optimiser in v0.6.0. This panel presents users with a detailed analysis of both peak and RMS headroom and allows to get the most out of the system.
Additionally, this panel allows making adjustments, i.e. setting the stimulus input level, which affects the mapped pressure in the 3D View and any panel with SPA mode (like the Microphones Panel). Settings made only affect one stimulus (that means you can have White Noise with a custom manual input level, while Pink Noise stays in Auto mode)
At the top, a dropdown allows the selection of a stimulus for which settings are to be modified and a headroom analysis is to be made.
Attention
To the right of this dropdown, there is an ‘OVR’ button. This button should always be off, as it being lit means you have entered a manual input level that is too high and you’re compressing the systems dynamics / headroom and relative gain levels won’t match anymore because at least one loudspeaker is hitting the limiter.

Right below the dropdown at the top, the input level for each stimulus individually can be set. Please note that in 99% of the cases, the setting should remain in ‘AUTO’ mode. If you’re an exception, you’ll know and probably shouldn’t be reading this! The value shown is the RMS signal level with which you can feed the stimulus into the systems without compromising dynamics, i.e. the loudspeaker with the least headroom will just hit a limit (limiter, mechanical, distortion, etc..) and has exactly 0dB headroom. All other loudspeakers will have 0dB or more headroom. In Auto mode, the value is automatically set to the Max Level which is shown on the right. In Manual mode, you can manually set this level to an arbitrary higher or lower value.
Using manual mode can be useful for example if you’re either willing to sacrifice dynamics (you shouldn’t!) or if you’re assessing noise pollution when the audience is treated with a certain level below the maximum capability of the system.
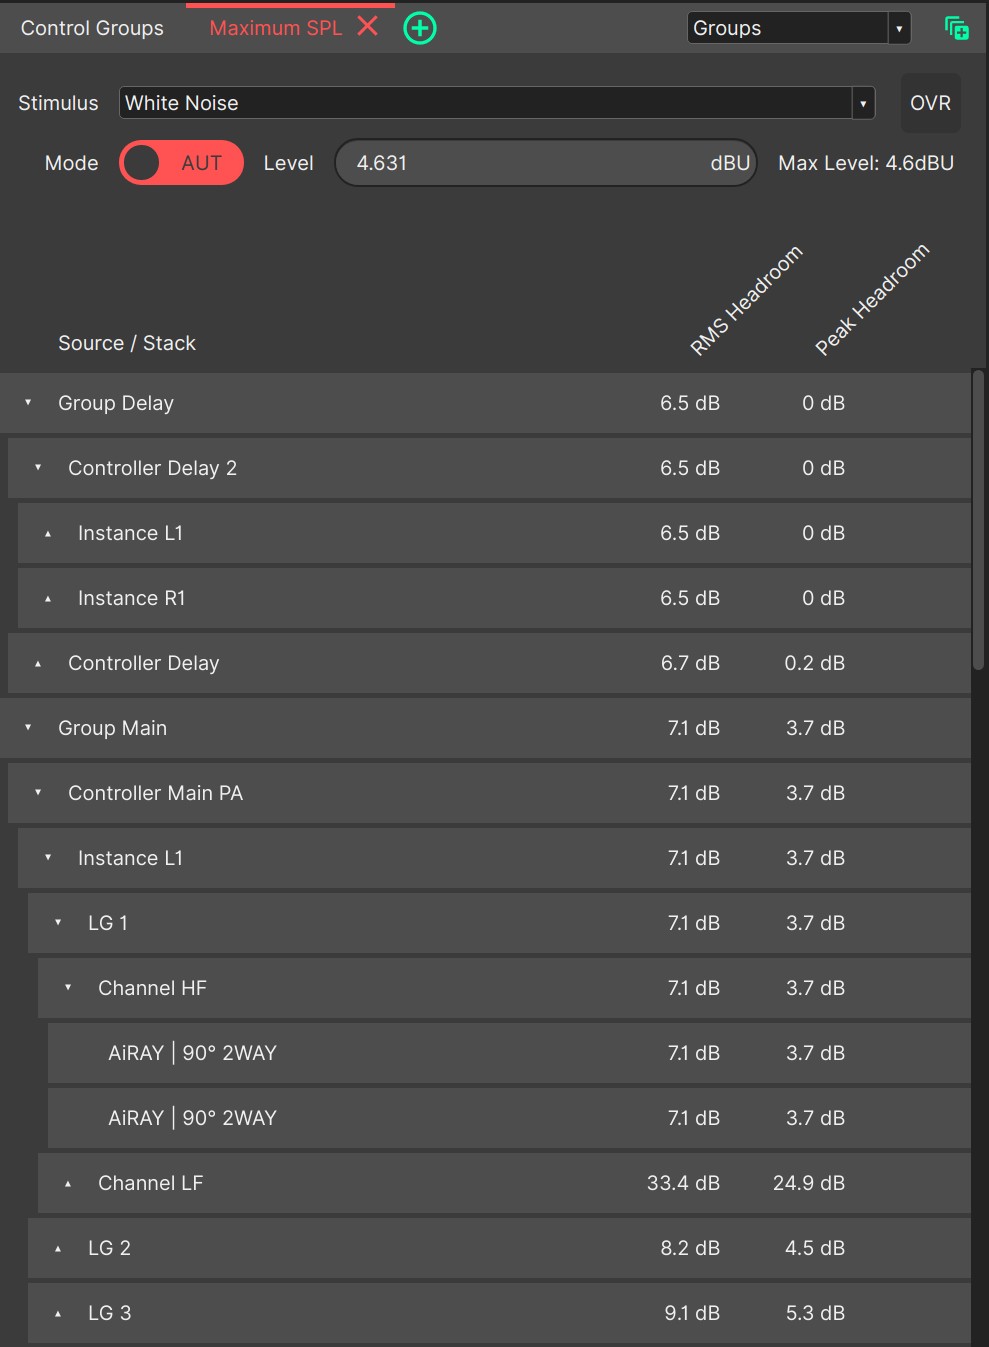
Headroom Analysis / Breakdown
At the bottom of the panel, a detailed headroom analysis of the entire system is shown. Headrooms are split up into ‘RMS’ and ‘Peak’ and facilitate optimal system design for any kind of music or signal. The headrooms are calculated by CODA’s innovative and no-compromise realSPL technology. No approximations, e.g. based on signal crest factor, are made. Instead a highly precise time-domain model of the entire signal chain is used.
Important
The Headroom Analysis is sorted in ascending order and the minimum of ‘Peak’ and ‘RMS’ headroom is used. The headroom of an arbitrary level is the minimum of the headrooms of all its children for ‘Peak’ and ‘RMS’ separately. For example, the headroom of an array controller is the minimum of the headrooms of all its assigned instances. The headroom of an instance is the minimum of the headrooms of all the Link Groups in it.
The headroom analysis has a hierarchy multiple levels that reflect the user’s group assignment as well as the system as it:
Groups
Array Controllers (Vertical Array, Horizontal Array, Subwoofer Array)
Instances (Stacks / Hangs)
Link Groups
Channels
Please note that for Subwoofer Arrays and Horizontal Arrays, the link groups are automatically created without any possibility for manual adjustment and also do not take the maximum current capability of amplifiers or recommended number of speakers per amplifier into account. This will be addressed in a future update, when a deeper integration of CODA’s amplifier platform is implemented.
Items can be expanded or collapsed by clicking them. If a flatter hierarchy is desired, a dropdown in the header allows for collapsing multiple levels:
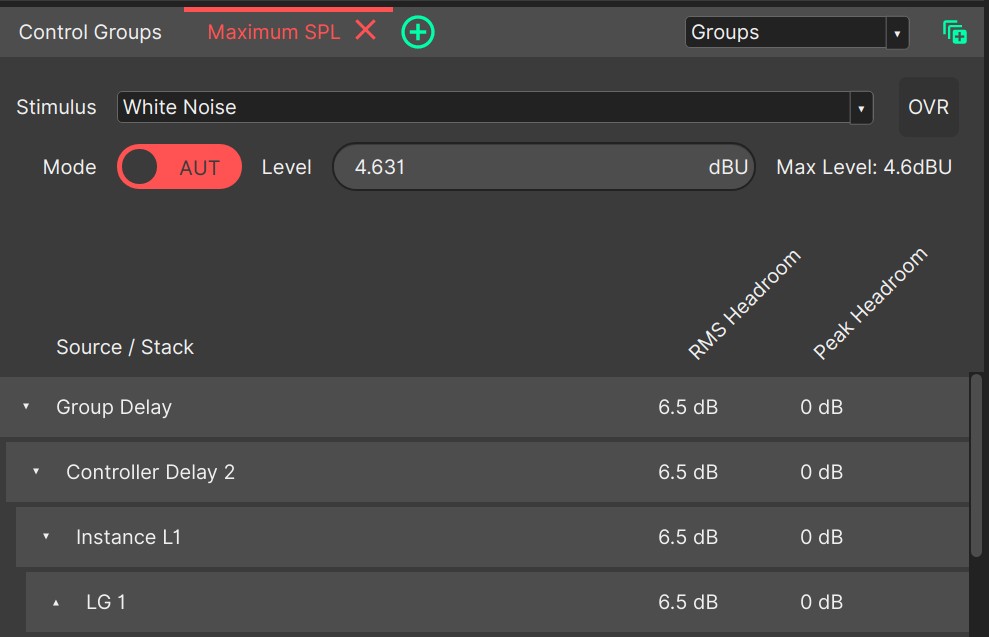
Headroom Analysis Default Hierarchy
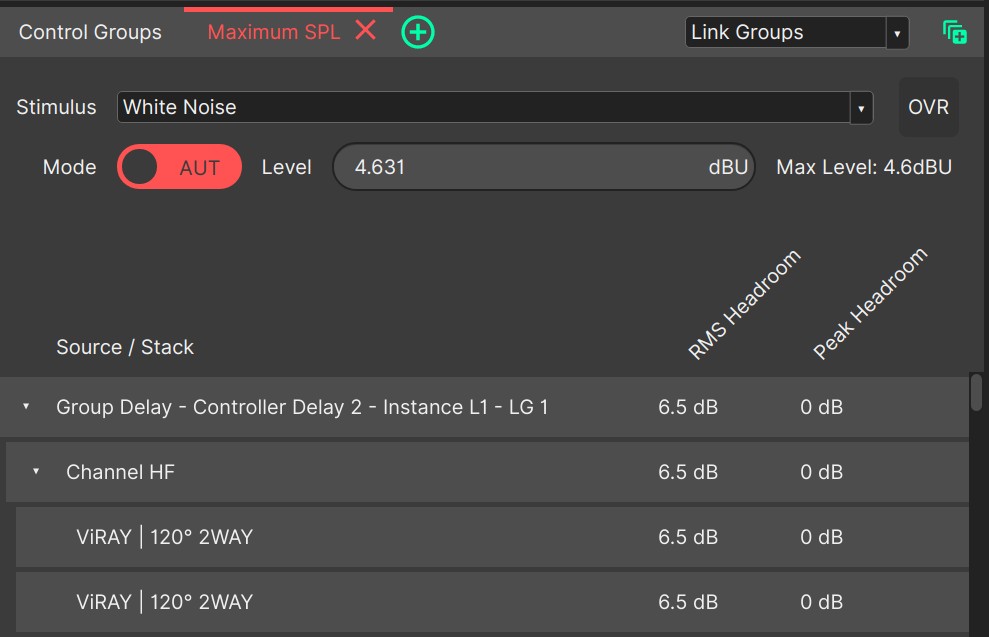
Headroom Analysis Flattened Hierarchy
If levels are collapsed, their names are appended to each other to still allow clear identification.