Floor Plans
A Quad can be created to display a floor plan in System Optimiser’s 3D View.
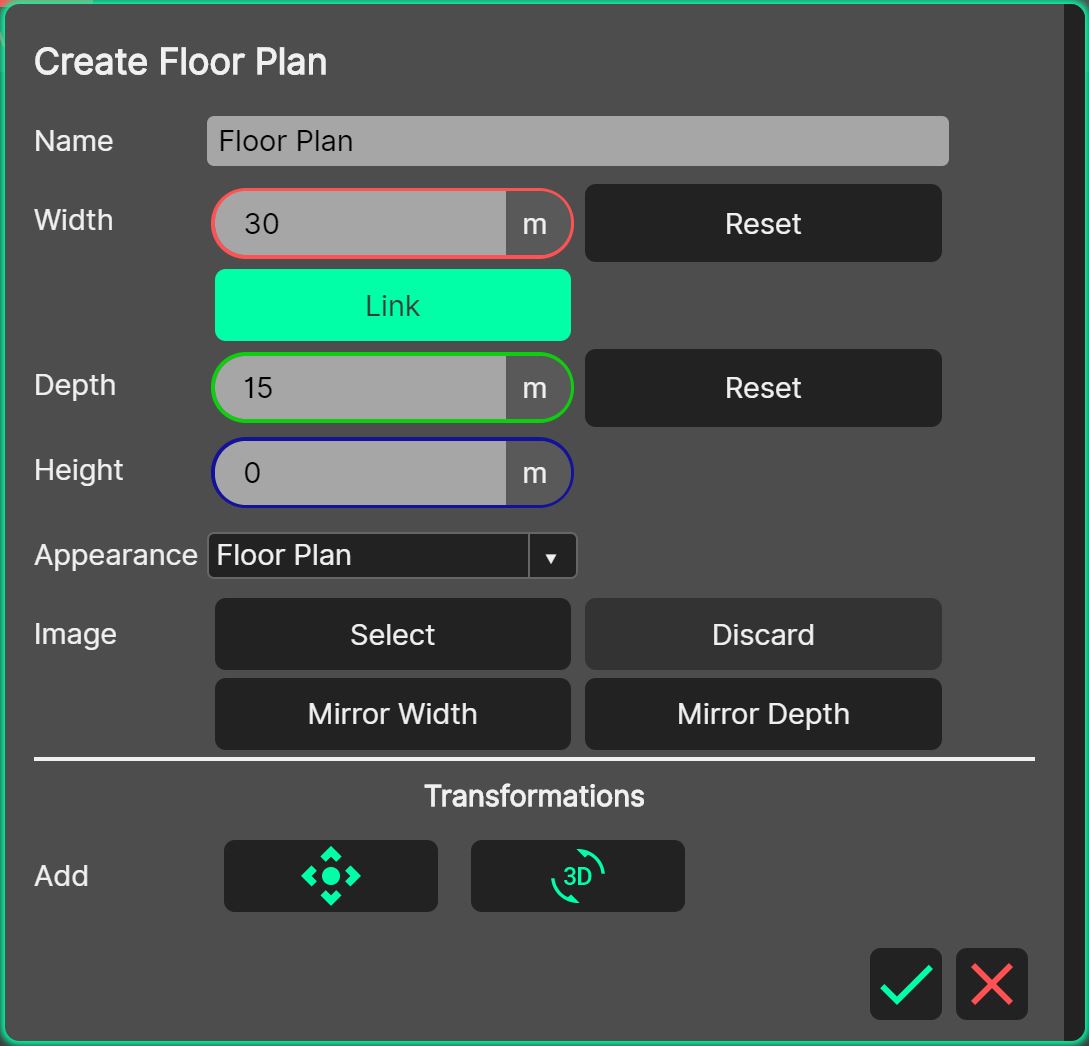
Start by creating a new Quad in the Layer Manager, opening its controller via the ‘Edit Pencil’, and setting the ‘Appearance’ drop-down to ‘Floor Plan’. This will hide the colour picker.
- Select an Image
To select an image to use as the Floor Plan image, press the ‘Select’ button to the right of the ‘image’ label. A native OS window will open, whereby you can choose the image to use. At present, PNG images are supported, and care should be taken to choose images with sensible file sizes, as these will be included within the project file.
- Discard an Image
To discard an image that was used as the Floor Plan image, press the ‘Discard’ button to the right of the ‘image’ label. The image will now be discarded.
- Mirror
Choose either ‘Mirror Width’ or ‘Mirror Depth’ to choose an axis to mirror the imported image along.
- Resizing and Scaling
With the ‘Link’ button selected (on by default), adjusting the Floor Plan’s size will retain the original scale. Click one of the data input boxes and scroll the mouse to change the size.
- Transformations
Transformations can be added to a Floor Plan. This work identically to transforming a layer. By using an Angular Transformation it is possible to use Floor Plans to add images/content to LED walls and video screens that may have been drawn as a visual aid.